The Uncertain Space: a virtual museum for the University of Bristol

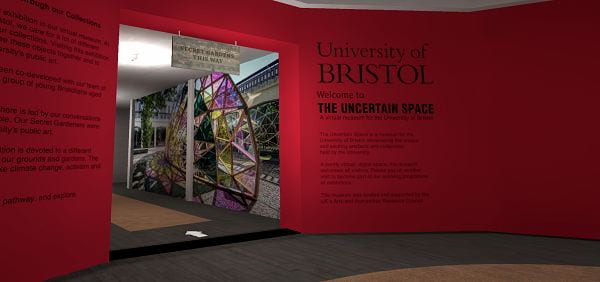
The Uncertain Space is the new virtual museum for the University of Bristol. It is the result of a joint project between Library Research Support and Cultural Collections, funded by the AHRC through the Capability for Collections Impact Funding, which also helped fund the first exhibition.

The project originated in a desire to widen the audience to some of the University’s collections, but in a sustainable way which would persist beyond the end of the project. Consequently, The Uncertain Space is a permanent museum space with a rolling programme of exhibitions and a governance structure, just like a physical museum.

The project had two main outcomes: the first was the virtual museum space and the second was the first exhibition to be hosted in the museum. The exhibition, Secret Gardens, was co-curated with a group of young Bristolians, aged 11-18 and explores connections between the University’s public artworks and some of the objects held in our rich collections.

Entrance to the Secret Gardens exhibition

The group of young people attended a series of in-person and online workshops to discover their shared interests and develop the exhibition. The themes of identity, activism and environmental awareness came through strongly and these helped to inform their choice of items for the exhibition.

hand pointing at manuscripts on a table
Choosing items from Special Collections for the exhibition

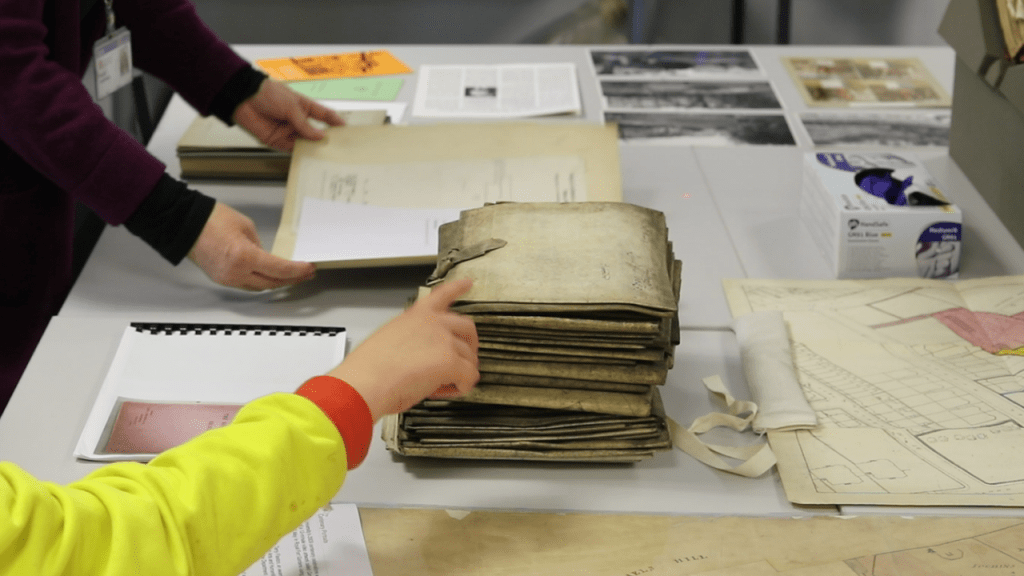
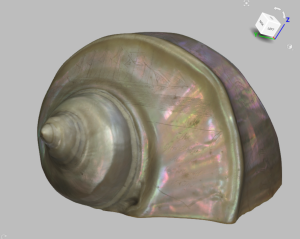
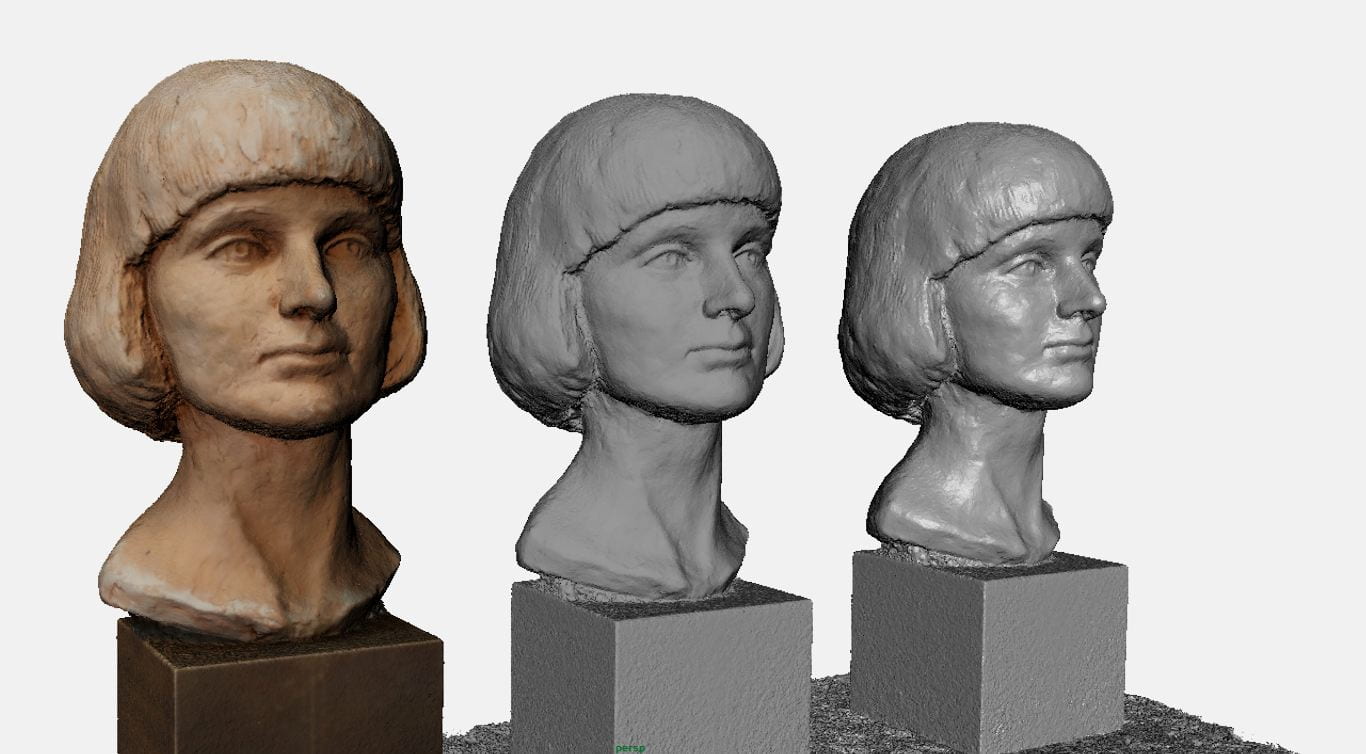
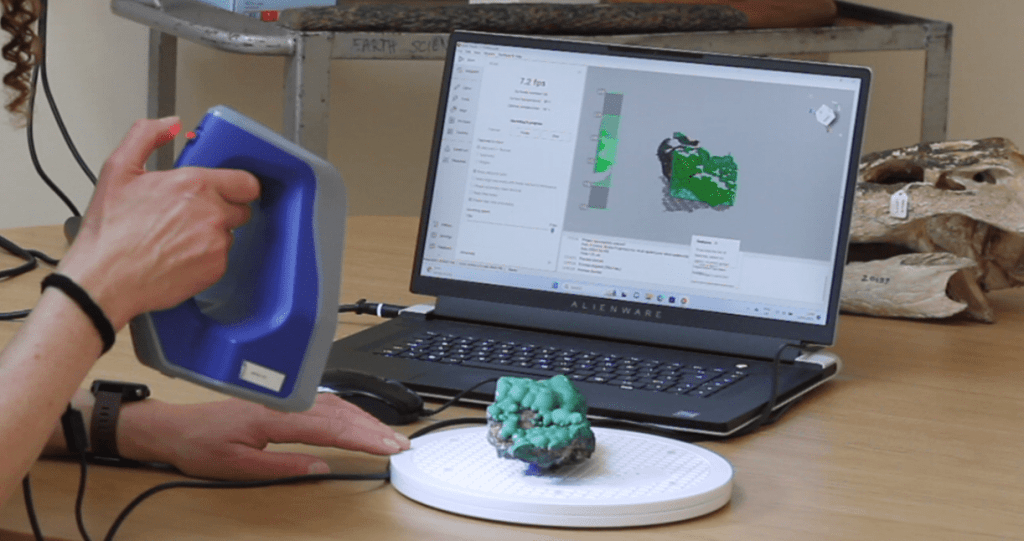
Objects, images and audiovisual clips, to link with each of the public artworks, were selected from the Theatre Collection, Special Collections, the Botanic Gardens and from collections held in the Anatomy, Archaeology and Earth Sciences departments. For some of the choices, digital copies already existed, but most of the items had to be digitised by photography or by scanning, using a handheld structured light scanner. The nine public artworks were captured by 360 degree photography. In addition, the reactions of the young people were recorded as they visited each of the public artworks and these are also included in the exhibition.

scanning a piece of malachite
Scanning a piece of malachite for the first exhibition

As the virtual museum was designed to mimic a real-world exhibition, the University of Bristol team and the young people worked with a real-world exhibition designer, and it was found that designing a virtual exhibition was a similar process to designing a real-world exhibition. Some aspects of the process, however, were unique to creating a virtual exhibition, such as the challenges of making digital versions of some objects. The virtual museum also provides possibilities that the real-world version cannot, for example the opportunity to pick up and handle objects and to be transported to different locations.

Towards the end of the project, a second group of young people, who were studying a digital music course at Creative Youth Network, visited the virtual museum in its test phase and created their own pieces of music in response. Some of these are included in a video about the making of the museum.

The museum and first exhibition can be visited on a laptop, PC or mobile device via The Uncertain Space webpage, by downloading the spatial.io app onto a phone or VR headset, or by booking a visit to the Theatre Collection  or Special Collections, where VR headsets are available for anyone to view the exhibition.

We are looking forward to a programme of different exhibitions to be hosted in The Uncertain Space and are interested in hearing from anyone who would like to put on a show.

You can read more about the making of The Uncertain Space and its first exhibition from our colleagues in Special Collections and Theatre Collection:
Our collections go virtual!
Digitising for the new virtual museum: The Uncertain Space

Shiny shells and steamships: an experiment in phototexturing a 3D model.

In the Library Research Support team we have quite a bit of experience of 3D scanning and of photogrammetry, but have never tried combining digital photographs with scan data to make a ‘photorealistic’ 3D model.
When we were asked to scan a large, engraved shell belonging to the Brunel Institute , we decided it was time to give it a go, using our Artec Space Spider structured light scanner and the ‘phototexturing’ function in Artec Studio 16.  This phototexturing option allows photographs of the object to be combined with the digital model to improve the model’s textures and produce a more photorealistic result.

The shell in question has a shiny surface and is engraved with text and images, including depictions of the SS Great Britain and Omar Pasha, an Ottoman Field Marshall and governor. Shiny surfaces can be problematic when scanning, but we dialled up the sensitivity of the scanner a bit and encountered no difficulties. We were also concerned that the very low relief engravings would not be discernible in the final model, which did indeed prove to be the case.

We were careful to capture both scans and photographs under the same conditions, scanning one side of the shell and then, without moving it, taking photographs from every angle before turning it over to scan and photograph the underside.

When processing the scan data, the main difficulty was fixing a large hole in the mesh which occurred in the cavity of the shell where the scanner had not been able to capture data. Because of the complex geometry, Artec Studio’s hole-filling options simply covered the hole with a large blob. Therefore, we used the bridge function to link opposite edges of the large hole and subdivide it into smaller ones, which could be filled with a less blobby result. We then used the defeature brush and the smoothing tool to reduce flaws. The result is not an accurate representation of the inside of the shell, but gives a reasonable impression of it and, without any holes in the mesh, the model can be printed in 3D.

Adding texture from the photographs was simply a matter of importing them in two groups (photos of the top and photos of the underside) and matching them to the fusion. A handful of photographs couldn’t be matched but there was enough overlap between the other photographs to complete the texture. The phototextured model does show some shadows as we were not using dedicated lights, but there is significant improvement in the resolution and in the visibility of the engravings.

an engraved shell
The shell before phototexturing, showing texture captured by the scanner.
an engraved shell
The shell with texture from the photographs applied.

When we came to experiment with printing the model, we found there was not enough 3d geometry to reproduce the engravings, though we had avoided simplifying the mesh during processing. As the faint engravings on the shell are mostly visible through discolouration, we think that 3D printing in colour would be a good solution and the Brunel Institute are also considering other possibilities, such as engraving directly onto a 3D print. We look forward to seeing the result of their chosen solution.

Digital toast: an introduction to photogrammetry

Photogrammetry is a technique which uses a series of 2D images of an artefact, building or landscape to calculate its 3D measurements. In the past it was done manually, but nowadays it involves feeding a number of 2D photographs of the subject, taken from different perspectives, into specialist software, which uses them to construct a digital 3D representation.

The digital 3D model may then be manipulated on a screen to show different angles, viewed in virtual reality or as a “fly-through” video, or printed using a 3D printer. It may be useful for study in research, teaching or to ensure preservation of the original.

Compared to other methods of 3D digitisation, photogrammetry is inexpensive, requiring, at the most basic level, only a camera and access to the relevant software program. It is particularly suitable for projects where a photorealistic model is needed.

This blog post recounts the experiences of a non-technically minded beginner in making two 3D digital models and hopefully illustrates that anyone can carry out a basic 3D digitisation project with only a little help.

For a first attempt at photogrammetry, an object that would be straightforward to digitise was needed. A plaster bust from the University of Bristol Library’s Special Collections department was suitable, since its matt surface would not reflect light, which can create problems when building the 3D model.  Also, being mounted on a plinth would make it possible to take photographs from all perspectives without having to turn over the object.

3 views of a digitised plaster bust
DM2171/13, University of Bristol Special Collections

The second object was chosen because it was particularly fragile and in need of a digital surrogate that people could study in order to minimise handling of the original. It was, unusually, a piece of toast, held by the University of Bristol’s Theatre Collection, which originated as a piece of publicity by Julie Flowers and Rosalind Howell for a live art performance entitled ‘Grill… A piece of toast’ at the National Review of Live Art 1994 Platform.

It is preferable to have even, natural lighting over the object to be photographed. Outdoors on a cloudy day would probably be the ideal situation, but indoor photogrammetry will normally be necessary when dealing with artefacts from the archives. It is best to avoid flash. In digitising the plaster bust and the toast, two lights were positioned to reflect off the white ceiling, to minimise shadows. LED lamps are best, when dealing with sensitive items, for purposes of preservation.

A turntable can be used to rotate the object while keeping the camera in a stationary position, but it is also possible to move with the camera around a stationary object if a turntable is not available.

Photographs should be taken from several levels with, roughly, a 30% to 50% overlap between images. The idea is to get coverage of all surfaces of the object, with enough overlap between the individual photographs to allow the software to identify common points and match up the images. Any part of the object not captured in a photograph will appear as a hole in the finished 3D model, so it is important to photograph any obscured parts of the object, for example up the nose or under the chin of the plaster bust.

The toast, having two sides, needed to be turned over (very gingerly, by the Archivist) and the process repeated with the second side. People have tried other solutions for capturing all surfaces of an object, such as finding ingenious ways to balance or suspend it, or placing it on a transparent surface, but these methods are not without problems (especially for a fragile object) so it seemed best to capture the two sides of the toast separately and rely on the software finding enough common points on the toast edges to match the two sides correctly.

The software used to process the photographs into a digital model was Agisoft Photoscan, which is straightforward for beginners to use as it has a workflow, beginning with adding the photographs and directing the user through the different stages of the process.

Once the photographs are added, Photoscan aligns the images by comparing the different viewpoints of the photographs and builds a sparse point cloud, which is a raw 3D model made of points but no edges. This can be tidied up, if wished, before building a dense point cloud. Depending on the number of images and capability of the computer, a significant amount of processing time may be needed.

The next stage is to build a mesh, which is a polygonal model, based on the point cloud data, so a bit like joining the dots of the point cloud. The final step adds the coloured textures that wrap around the model so that it looks realistic.

The 3D model of the plaster bust came out well first time, but it took several attempts for Photoscan to fit together the two sides of the toast. The best method turned out to be to process the photographs in two batches, one for each side of the toast, and then to match the two sides together by marking the same identifiable point on the edges of each half, so that Photoscan could correctly align the two halves into one 3D whole. In addition, the background, on which the toast had lain, needed to be manually edited out, as Photoscan had not recognised that this was not part of the object, which had happened automatically with the bust.

The 3D model can then be exported and three files will be generated: an .obj file containing the 3D geometry; a .png or.jpg file containing the colour and texture information; and the colour placement information (.mtl) which provides co-ordinates to map the colour and texture on to the geometry.

The final model can be viewed in Windows 3D Viewer, or uploaded to an online platform for sharing, such as Sketchfab.

The Library Research Support team runs courses on 3D digitisation, which concentrate on photogrammetry, but also touch on structured light scanning. The team also has a selection of equipment, including cameras, scanners and a PC with the Agisoft Photoscan software, which can be booked and used by University of Bristol researchers.  You can find out more on our digital humanities webpages.